Excalidraw the Corner Icons
In this tutorial of Exalidraw will go over the different icons you'll see around it and go over what the they can do.
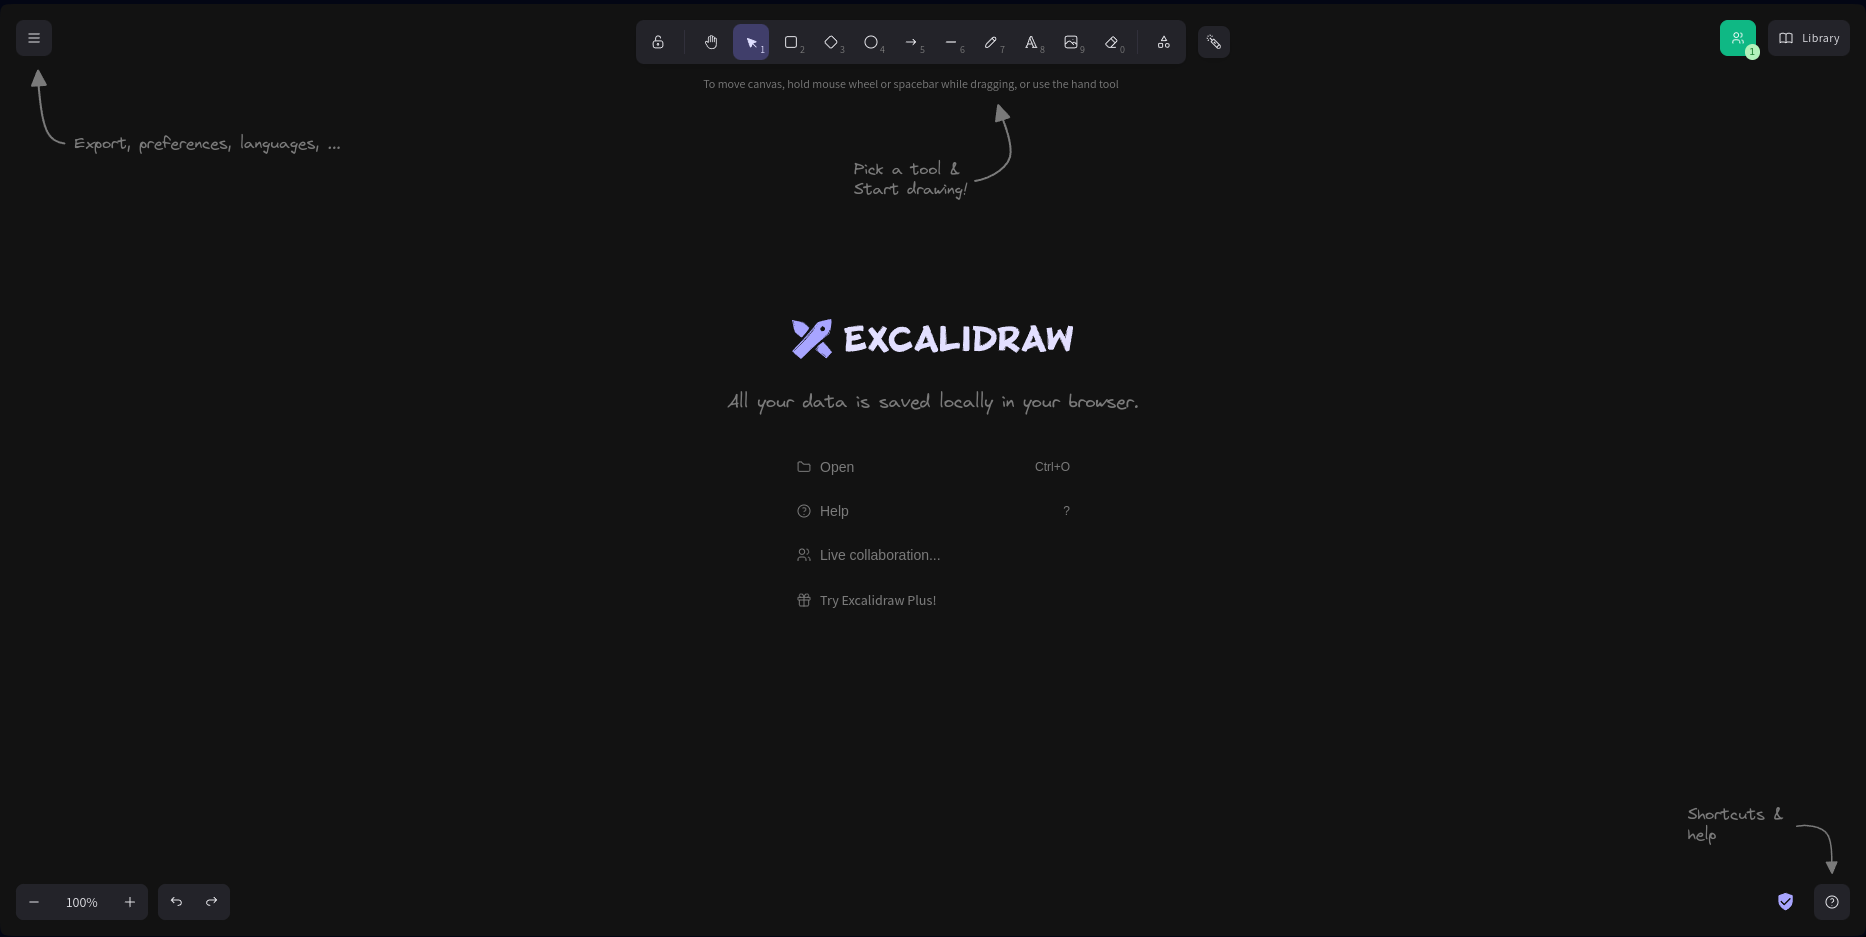
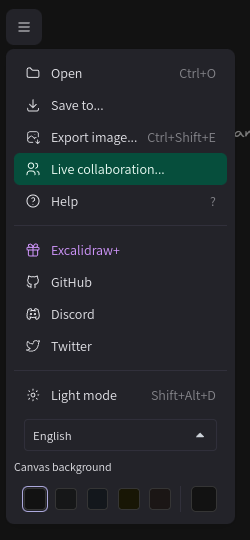
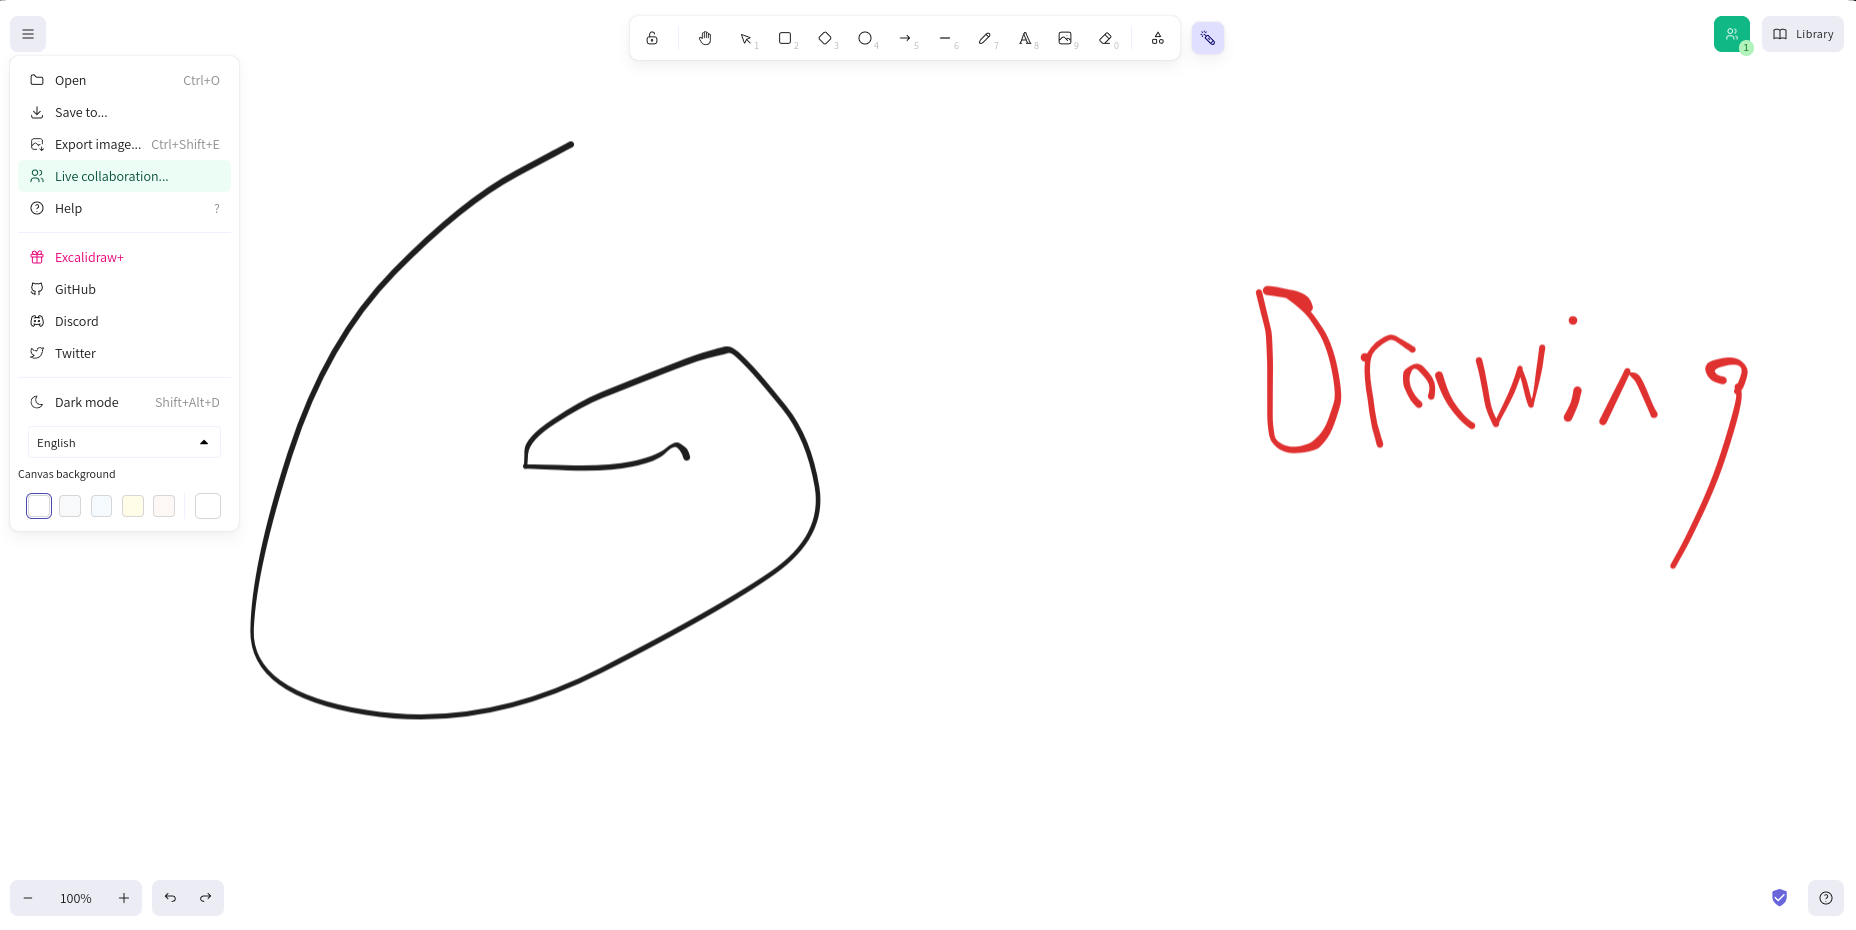
First will be starting will the top left Icon with the arrow pointing at it with export, preferences, languages,. When you click on that a dropdown menu will come down that will have list of things you can do on it.
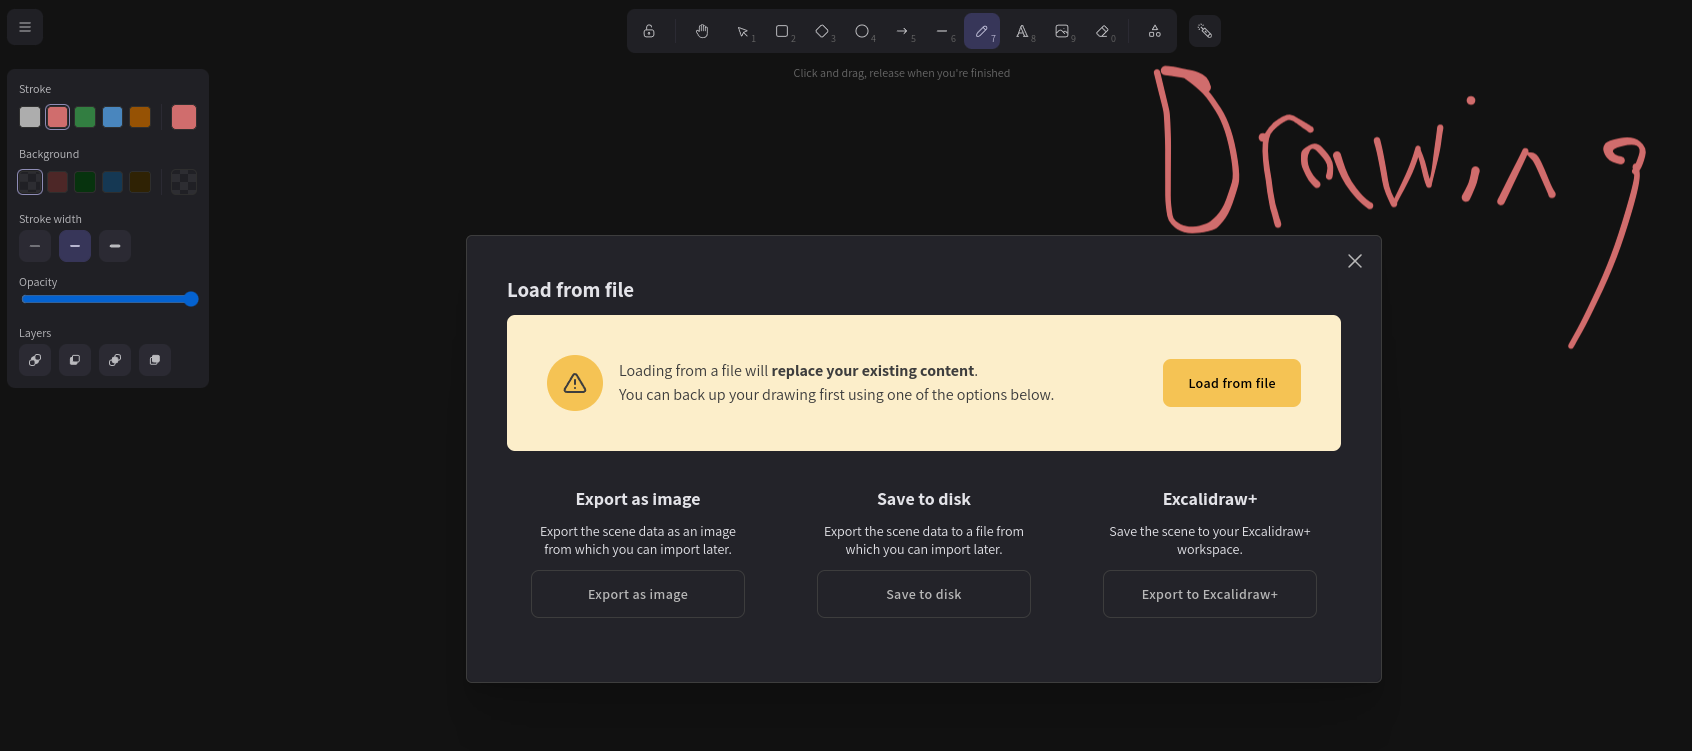
FOLDER WITH OPEN: The "Folder with Open" option is located within Excalidraw and serves as a means to access and manage scene data photos. It provides you with several functions related to opening and importing these saved scenes. When you select the "Open" option, it will take you to your computer's photo storage, allowing you to open and load scene data photos. These photos are essentially snapshots of previous canvases you've created using Excalidraw and saved on your computer. A scene data photo typically represents a previously created Excalidraw canvas. When opened, it replaces whatever content is currently on the canvas with the saved scene data photo. This can be incredibly useful for revisiting and working on past projects. It's important to note that when you open a new scene data photo, it will replace any content currently on your canvas. If you had an ongoing drawing or diagram, using "Open" will discard it and load the content from the scene data photo instead. If you already have scene data loaded and you attempt to open another, you'll receive a warning message. It will caution you that "Loading from a file will replace your existing content," which means any background or content will be deleted and substituted with the new scene data. When you're working with scene data photos, you'll also notice three other buttons: "Export as image," "Save to disk," and "Export to Excalidraw." These buttons provide you with the options to export your current canvas as an image, save your work to your computer, and export it back to Excalidraw.
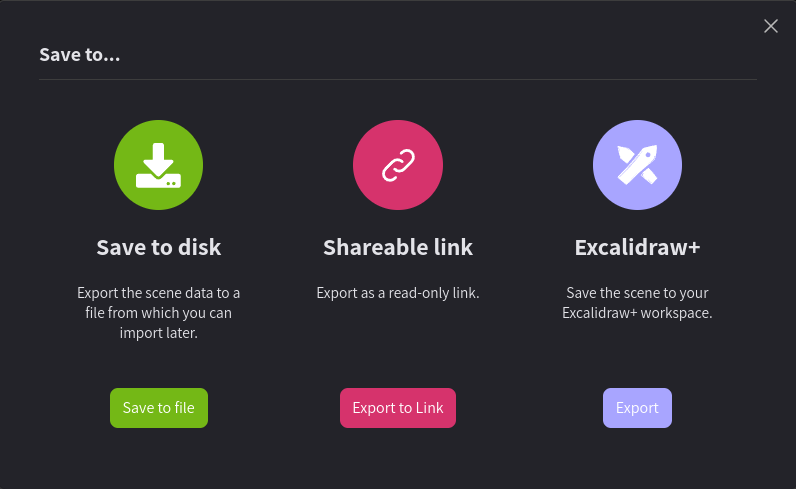
SAVE TO: In Excalidraw, the "SAVE TO" section offers you three distinct buttons, each with its own color – Green, Magenta, and Lavender. These buttons enable you to save and manage your canvases in different ways, making it convenient to store, share, and collaborate on your creative work. The green button labeled "Save to Disk" allows you to download your canvas as a code file onto your computer. This code file essentially encapsulates your current canvas. You can think of it as a snapshot of your work. Later, if you want to revisit the same canvas, you can utilize the "Open" function (as explained previously) to access the saved code file and open it in Excalidraw. This enables you to edit and continue your work from where you left off. In addition, once you've saved a canvas, a new option called "Save to Current File" appears in the drop-down menu. This feature lets you save your ongoing work within the same file, so you don't need to create a new file each time you make changes. The magenta button with "Shareable Link" underneath it is particularly useful for collaboration and sharing your work with others. When you click on "Export Link," it generates a new tab called "Shareable Link." This link leads to a copy of your canvas, but it doesn't save this version to Hugo Cloud. It's like a clone of your original canvas. By exporting this link repeatedly, it's akin to having a saved version of the edited canvas. You can then share this link with others, enabling them to view and edit the canvas, without altering the original. It's an ideal way to collaborate and get input from multiple contributors while preserving the initial work. The lavender button, labeled "Excalidraw+," provides access to a separate site. When you click on this button, you'll be directed to a new webpage where your canvas is displayed. If you have an Excalidraw+ account, you can sign in and save your canvas to your account. Excalidraw+ offers advanced features and storage options, allowing you to securely save your work and access it across different devices. It's a convenient option for users who require more extensive cloud storage and enhanced functionality.
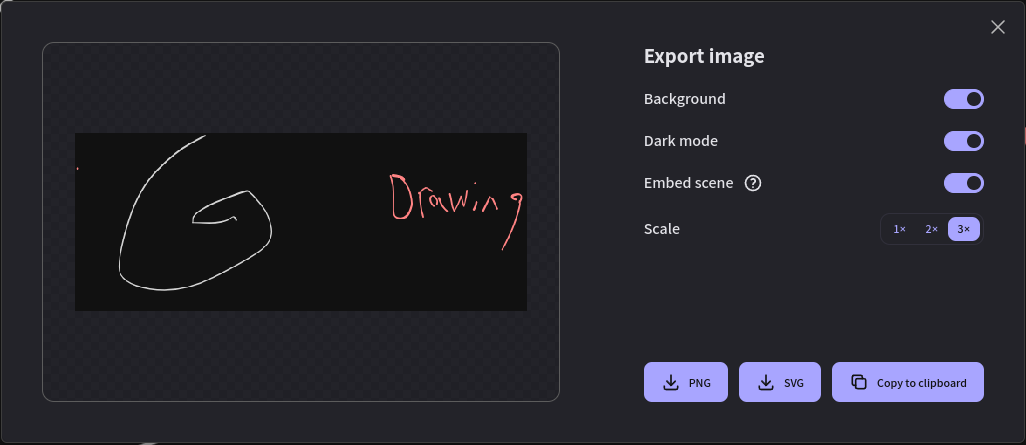
EXPORT IMAGE: In Excalidraw, the "EXPORT IMAGE" feature empowers you to tailor how you save your canvas onto your computer. When you click on it, a new tab opens, presenting you with several customization options for saving your canvas image. The topmost button, "Background," allows you to remove the canvas background, making it transparent. This means you'll save only the elements you've drawn without the canvas background itself. The "Dark Mode" option essentially inverts the colors of your canvas, changing dark elements to lighter shades and vice versa. This feature is particularly useful for adjusting the canvas appearance to your preferences. For example, if you have a white background with light blue elements and you activate dark mode, the background becomes black, and the blue elements turn slightly darker. Enabling "Embed Scene" lets you save the image in a way that allows you to open it back on the Excalidraw canvas. This can be helpful if you intend to continue working on the canvas at a later time. However, be aware that saving with "Embed Scene" may result in a larger file size. The "Scale" option enables you to determine the size of the saved image. You can choose between different scaling options, such as 1x (lower resolution) and 3x (higher resolution). This feature gives you control over the image's dimensions. The last three buttons, "PNG," "SVG," and "Clipboard," let you specify the format in which you want to save the file. "PNG" and "SVG" represent different file formats you can choose based on your needs. "PNG" is often used for static images, while "SVG" is a vector format that allows for scalable and editable graphics. The "Clipboard" option saves the image to your computer's clipboard, allowing you to paste it into documents, emails, or other applications. Keep in mind that pasted images are view-only and cannot be edited by others.
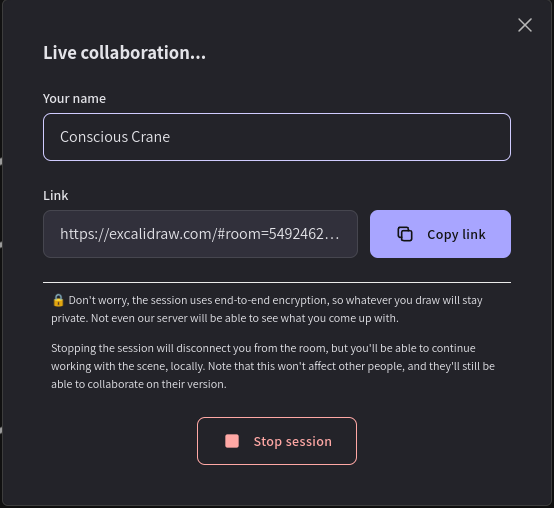
LIVE COLLABORATION: When clicking on this icon a new tab will appear in front of you. First things you see bar that you can type with name Conscious Cane and above that is title to bar your name. Basically in that bar type your name or whatever you want people to see you has example Executive Director and people will see that name when joining going from that if you want people to be able to join your canvas you see in middle of the tab with bar filled in with tab and above it link. Press the copy link button and paste that to anyone you want to join on that canvas. Lastly at the bottom you'll see stop session if you press that this will make it so people can't join your canvas and you alone can see it if you want to turn it back on the tab will change and there be giant lock on page and at bottom middle button that says start session pressing that will turn the session back on allowing people to join again.
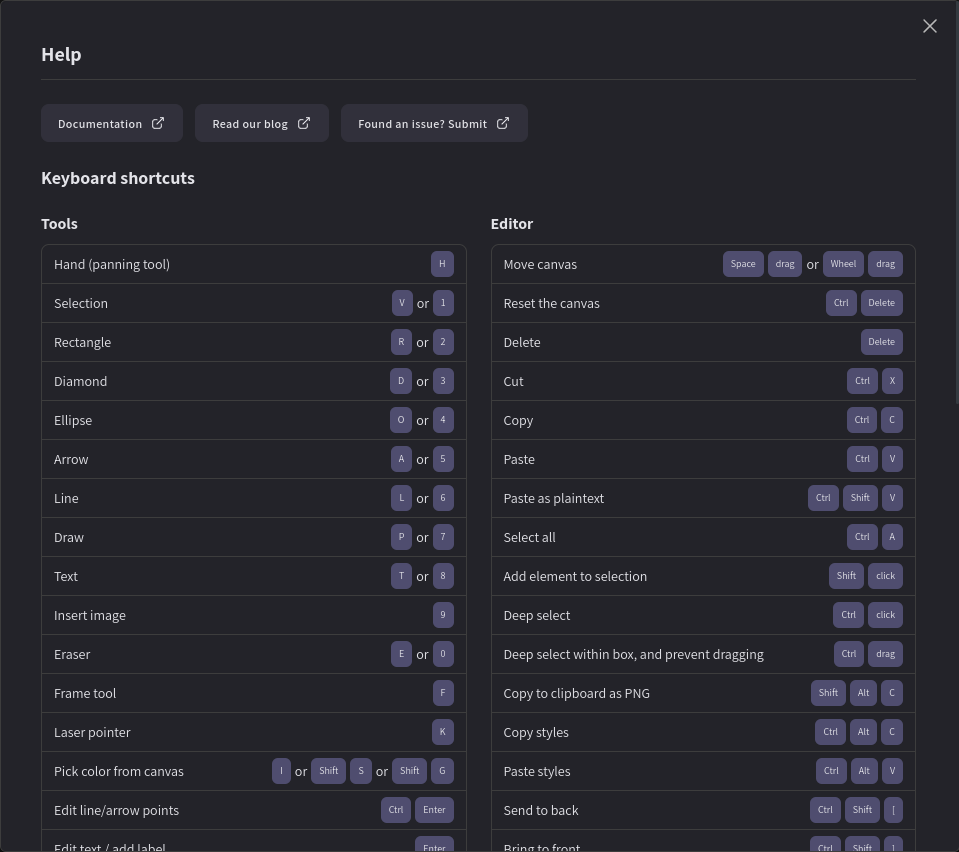
HELP: When you click on the "Help" icon, it will take you to a page featuring three prominent icons at the top, along with a series of bars below, each with highlighted words or letters, offering convenient shortcuts for various actions on the canvas. For instance, the first bar, labeled "Hand (panning tool) H," lets you switch to panning mode with a simple 'H' key press, streamlining your canvas exploration. Additionally, at the screen's top, you'll find three buttons: "Documentation" provides in-depth explanations for complex program features, aiding you in mastering its intricacies; "Read Our Blog" offers insights into recent updates and the app's history, keeping you informed about its evolution; and the "Found an issue? Submit" button leads to a platform where you can report encountered program issues or bugs, with the developer committed to addressing them, ensuring ongoing program enhancements.
EXCALIDRAW+: This feature will take you to excalidraw+ website to where you can see all the unique the features the + version can give you and sign in there if you have a excalidraw+ account.
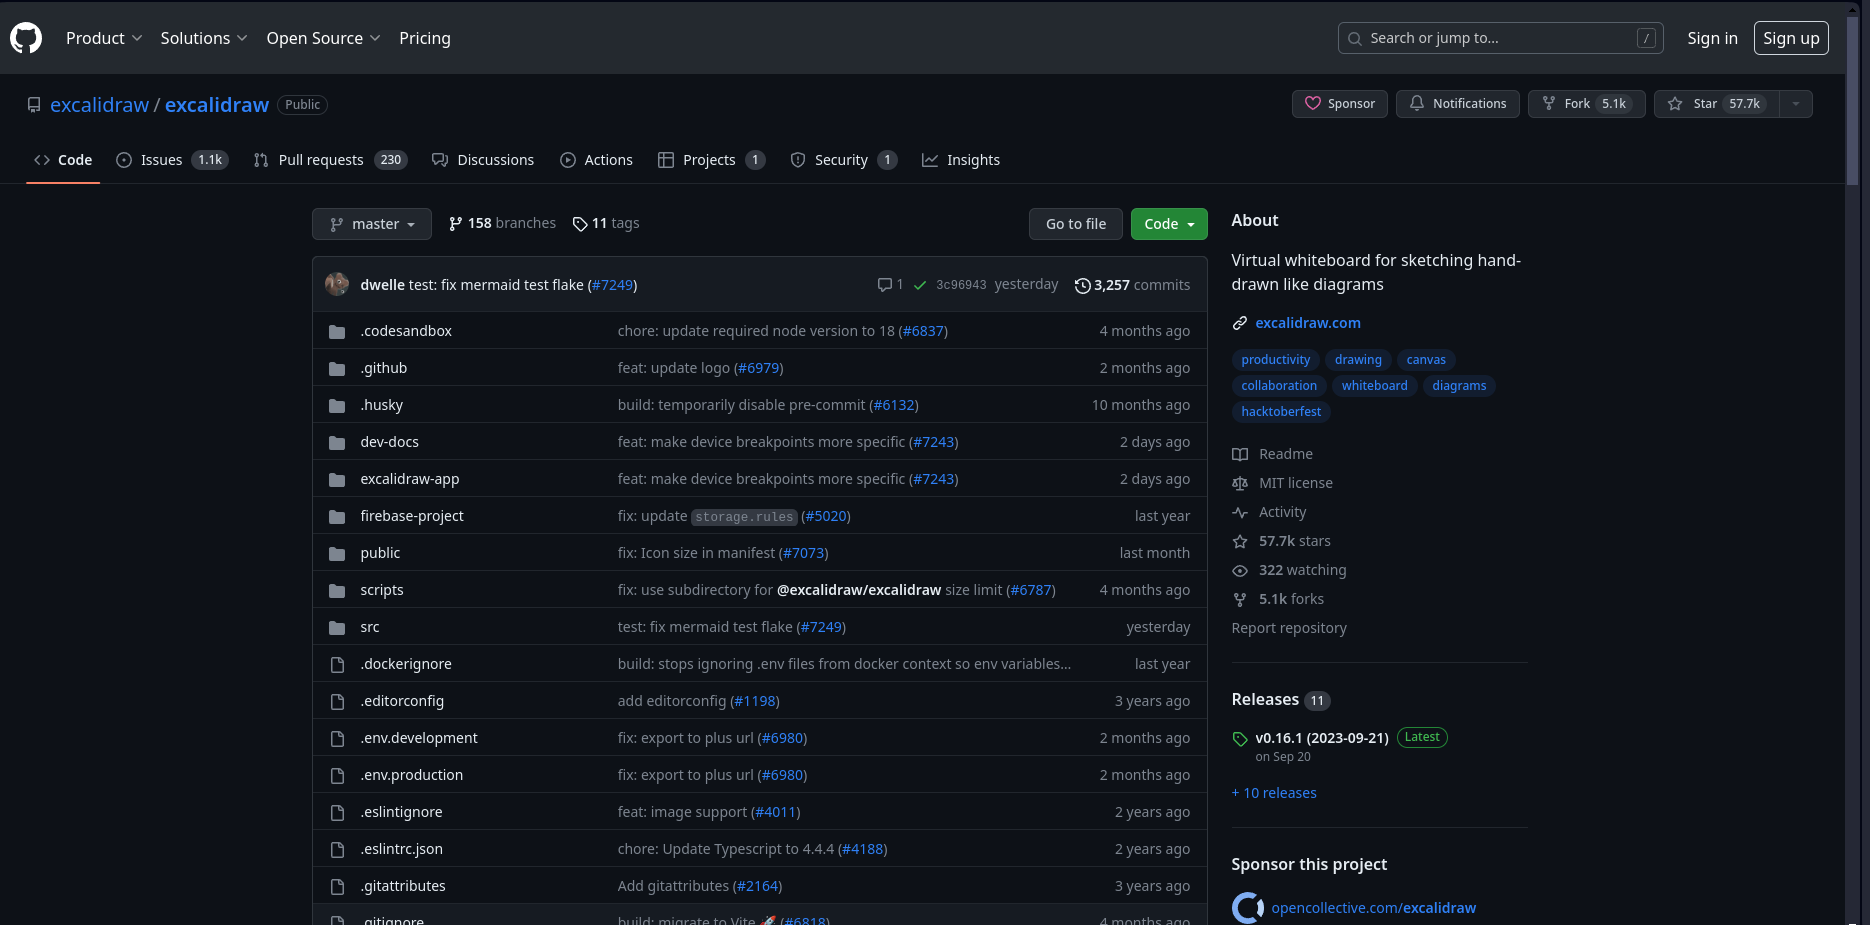
GITHUB: This will take you to the code of excalidraw and files there you can download all the files and get deep into the complexity of excalidraw.
DISCORD: When you click on this it will take you to Excalidraw discord to where you can join and talk to Excalidraw community and talk with the devs.

TWITTER: You can see update about the team and apps of excalidraw.
LIGHT MODE: The Light mode is essentially "Dark Mode" option where it inverts the colors of your canvas, changing dark elements to lighter shades and vice versa. This feature is particularly useful for adjusting the canvas appearance to your preferences. For example, if you have a white background with light blue elements and you activate dark mode, the background becomes black, and the blue elements turn slightly darker. Also when you press it where it said Light mode it will turn into dark mode and you can switch it back.
ENGLISH: Clicking on that will show list of languages and whatever one you select will the change the all text to corresponding language so if you put it in French every piece of text would get translated to French.
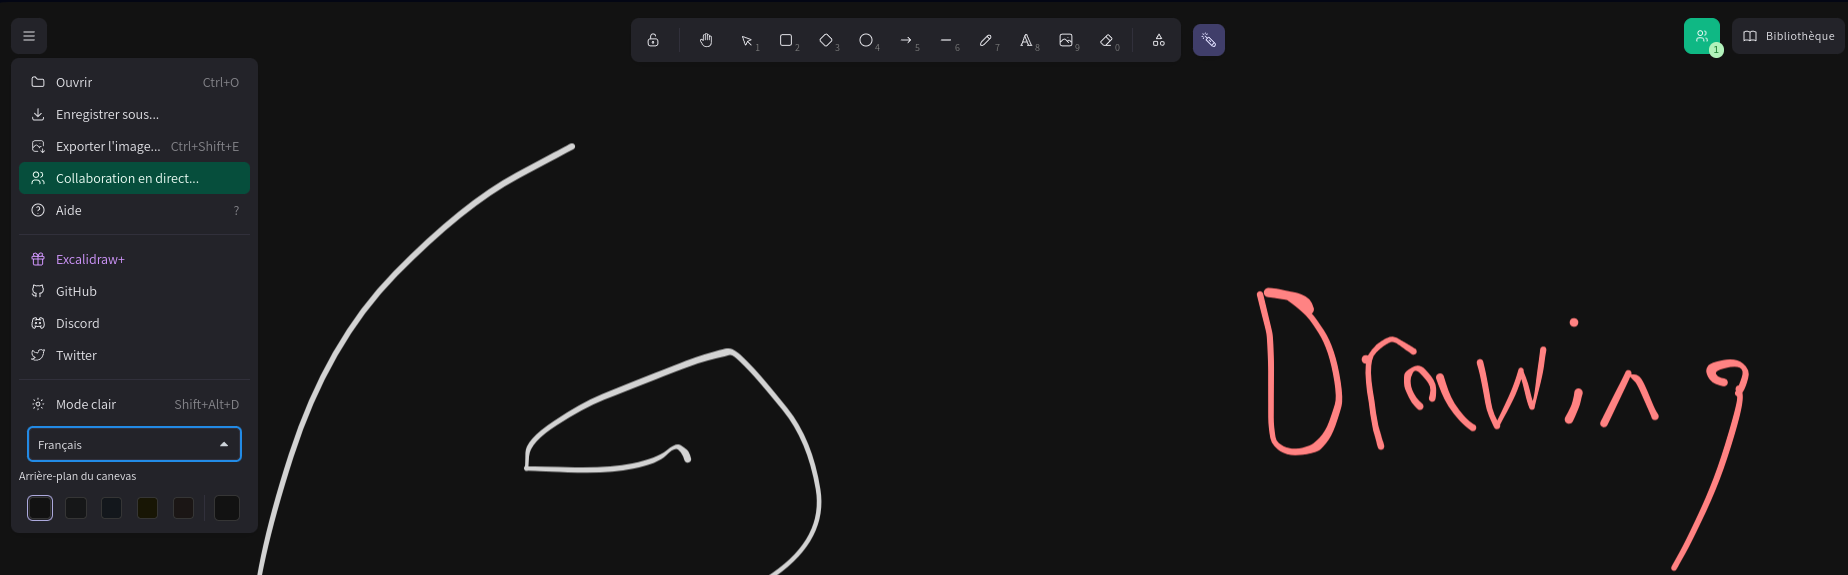
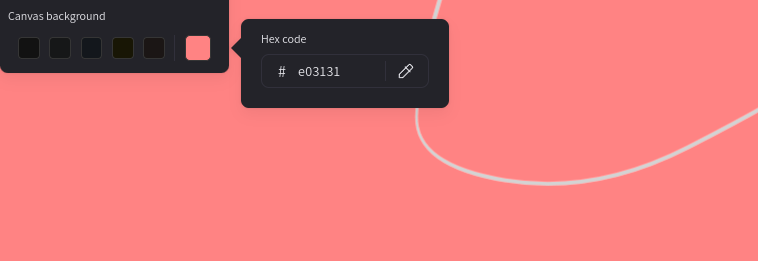
CANVAS BACKGROUND: There you see 6 squares and if click on any of the squares it will change the background to that corresponding color. If you pick the square furthest to the right a little tab will appear to the right of it that says hex code with #ffffff under it. In the #ffffff you can switch it to the hex code of the color you want. A hex code color is a specific numbers/letters up 6 and when you put in a hex code of that specific color it change the canvas background to that color. Also to the side of that is image that looks like eye dropper with that if you have specific color that you like on your canvas that you want to change the background to you can take that eye dropper over the color and press left click and it will change the background color of the canvas to that color.
ZOOM OUT AND IN: At the bottom left corner of the screen you'll see a bar with - 100% +. If you click on the - it will zoom you out on the canvas and if you press the + it will zoom you into the canvas and pressing either - or + will change the number in between them that number shows how zoomed in you are by how high the number is and it will show you how zoom out you are by how low the number is.

UNDO AND REDO: Next to the Zoom in and out function are two arrows one that points left and one that points right if you click on the left arrow it will undo whatever the previous thing you did and if you keep clicking on it'll keeping undoing things until there is nothing left to undo. Clicking on right arrow will undo your undo so lets say you undo something you didn't mean to you can undo that undo by clicking right arrow.
![]()
SHIELD: Hoving over this will show you information about how this canvas is protected from prying eyes.
![]()
Question Mark: Clicking on the question mark on the bottom right corner will take you to the help menu that you shows button shortcuts and Documentation, Read Our Blog and Found an issue? Submit buttons.
![]()
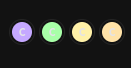
GREEN ICON: The green icon on the top right corner the number on the corner of it shows you how many people are on the canvas. Clicking on the icon will take you to the Live collaboration tab which you can invite people from here.

PEOPLE ICON: This icon will only appear if someone is in your canvas and more can appear if more people show up.
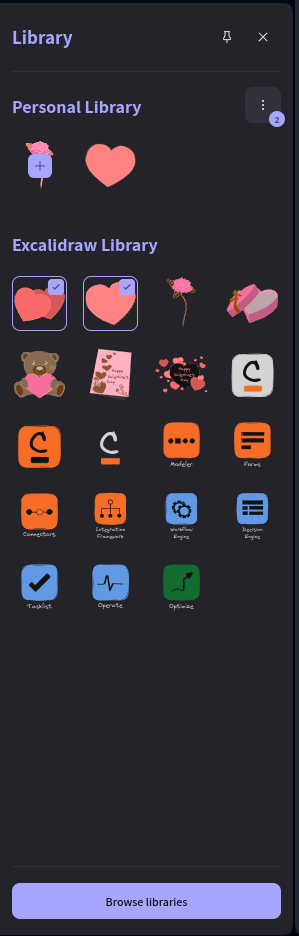
LIBRARY: The Library feature, located in the top right corner with an icon resembling a book and the word "Library" next to it, opens a new tab when clicked. Within this tab, you'll discover a "pin" icon at the top right that reveals additional hidden options. To close the tab, simply click the "X" next to the pin. This Library allows you to effectively manage resources, primarily the "Browser Libraries" option, which opens a new tab where you can add images to a library connected to your canvas. For each image, you'll find "Add to Excalidraw" and "Download" options. "Add to Excalidraw" places the selected image into your canvas inventory, while "Download" lets you save the image to your computer. Upon selecting an image, you'll be taken back to your canvas in the "Browse libraries" tab, where you can add the images to your canvas. To add multiple images, simply click on them, and a checkmark will appear when hovering over each. The three-dot menu offers options: "Save to..." to save selected images on your computer, "Remove" to delete images from your canvas library, and "Publish" to submit a group of images to add to Excalidraw as a list in your canvas library. If no images are selected (no checkmarks), you'll encounter icons for "Open," "Save to...," and "Reset Library." "Open" lets you add images from your computer to your library, "Save to..." saves your library to your computer, and "Reset Library" removes all images. Images used in the library are added to your personal library with a "+" icon, which, when clicked, places the image in your personal library for future use. If no image is selected, clicking on another will replace the previous one in your personal library.