
Excalidraw: Tutorial for the Main Art Tools
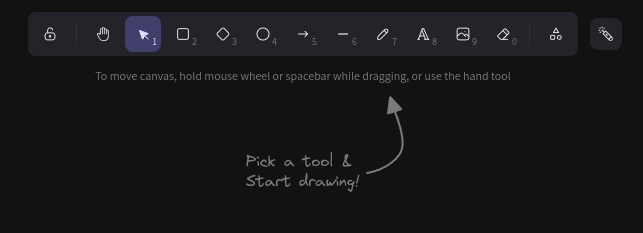
In Excalidraw in the top middle of that page you'll see 14 icons will go over.
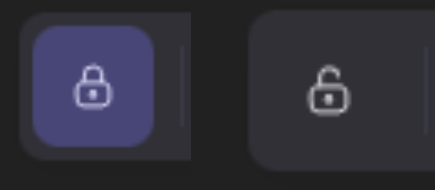
LOCKS: The furthest one to the left that lock when pressed will be closed lock and clicked again will be a open lock. When the lock is open when your using any tools it will set the you back to the icon of mouse with 1. The close lock will keep you on the icon you click and won't put you on mouse with 1.
HANDS: The hand that is second in the bar lets you grab the screen and move your camera. While your on the hand you'll be unable to to interact/select anything on the screen. The hand is only useful for moving around on the canvas. You can also switch to this mode by simply holding middle mouse button and once you let go if you go back to whatever icon you were on before.

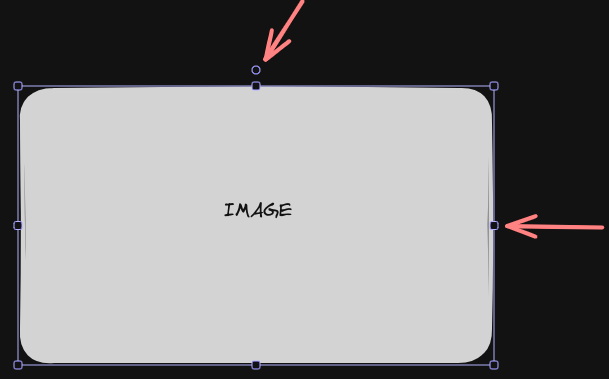
THE MOUSE: After the hand you'll see a mouse with one next to button right of it. With this you can select anything on the page that you have put down and you can enlarge it but clicking on in and you see 8 blue squares on it if you grab any sides of it you can stretch the image. There is also a blue circle on the top of middle top that you can rotate the image with. Also if you click on it and hold it you can move the image around or you can hold left click on empty part of the screen and you'll see blue box when you move anything in that box is all selected as one item which you can make bigger or delete.

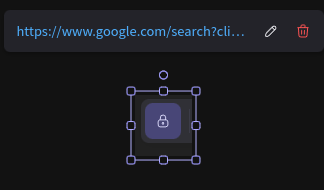
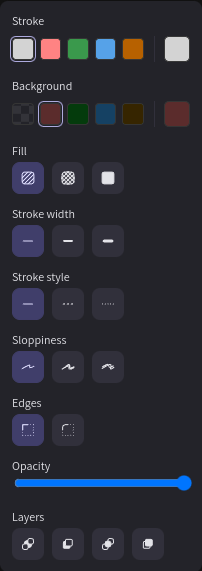
The last thing you can do with the mouse is when you click on a image a box on left the screen will appear with different kinds of buttons. The Opacity while lowering the bar or increasing bar will make the image more or less visible. Then the layers will set which image has priority appearing on the screen from left to right, the left layers is the least important while going the right mean the that image is more important and will not be overlap by image that matters less. Then in action the clicking the two boxes while duplicate the image, then clicking on trash can with delete the image and the link will let you put a URL on a image so if someone clicks on the image a link will appear above it.

SQUARE: The icon square with 2 next to it when you click that you'll see a box will appear on the left that has Stroke, Background, Fill, Strokewidth, Stroke Style, Sloppiness, Edges, Opacity, Layers. Stoke will be the color of the outline of box, Background will fill the inside of the square with whatever color you want and the one to the left that looks like black and grey boxes that will make the background transparent. If you decided to have background color you can have fill for background of the box it can be lines or just filled in. Then we have stoke width that would make the thickness of the lines of the boarder of box. Stroke style would be the style of the line of the boarder of box which would be solid line or doted lines as the boarder. Sloppiness would make the writing more sloppy depending on which one to where one is perfect and other is sloppier. Edges would allow you make the corner of the box round or not.
You can create a square by clicking by left clicking and holding and moving the mouse and move you can create square to what size you want moving to left makes it wider, moving further down you get longer and moving diagonal make it wider and longer.
DIAMOND AND CIRCLE: The diamond with 3 next to it and circle with 4 next to it are the same as the square except circle doesn't have edge option.
ARROW: The arrow with 5 next to it have same thing with square with few difference and that were there was new option of Arrow heads that let you decide what the back or front of the arrow like there was circle end and a normal head. Also when using the arrow if you just press left click once desired starting point. You can continue adding points by clicking where you need them, and when you're ready to complete the selection, press the Enter. Or you can hold left click then let go will just make one arrow.

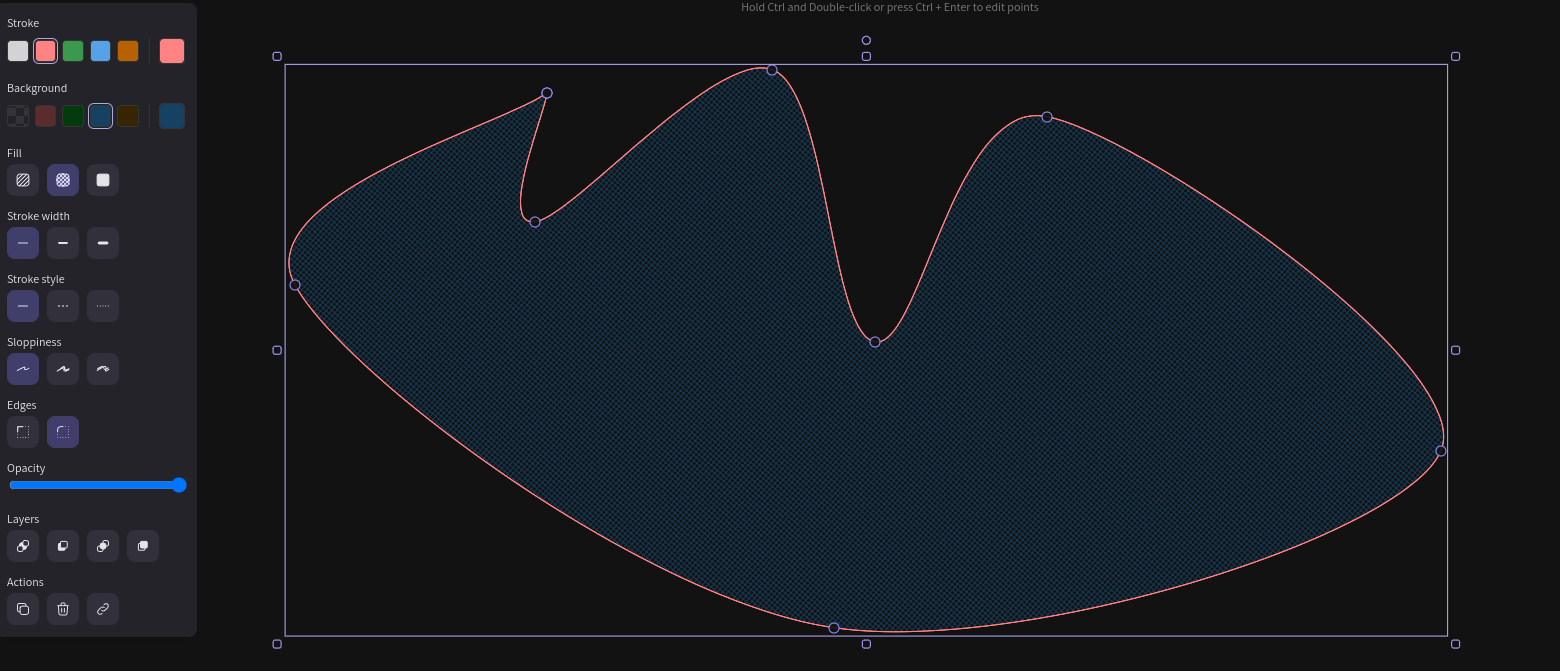
LINE: The line with 6 next to it. Using the Line tool, you can draw straight lines. Click once to set the starting point, and then click again to create an endpoint. This will result in a straightforward line connecting the two points. The Line tool offers a unique attribute known as "Edge." When using this option, you can draw lines with circular endpoints instead of blocky ones. This feature allows you to create lines with a softer appearance. An interesting feature of the Line tool is its ability to automatically close shapes. If you draw a line and connect the endpoint back to the starting point, Excalidraw recognizes this and automatically closes the shape you've drawn. It turns the shape into a closed loop, allowing you to create custom closed forms with ease.
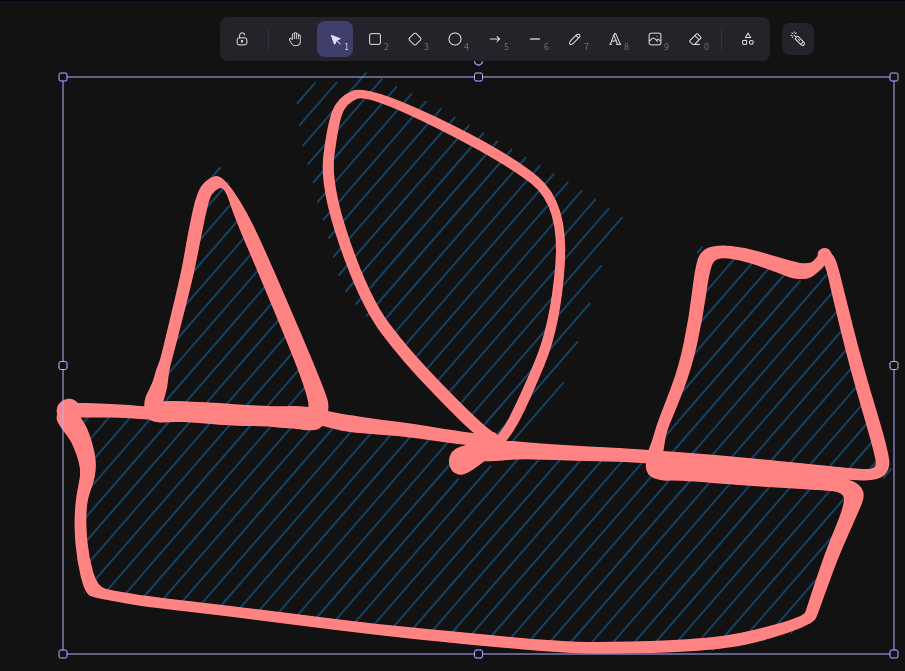
PENCIL: The pencil with 7 next to it is primarily used for freehand drawing and allows you to create hand-drawn elements on the canvas. The Pencil tool is designed to mimic the experience of using a physical pencil on paper. You can draw whatever you like with it, whether it's shapes, lines, or handwritten content. Unlike certain other tools, the Pencil tool only provides a single start and endpoint for drawing. This means you can't create shapes or lines with multiple endpoints, but it's perfect for single, hand-drawn strokes. The Pencil tool does not offer additional styling options such as Stroke Style, Sloppiness, or Edge that are available with some other drawing tools. It's a simple and straightforward tool focused on freehand drawing. One notable feature of the Pencil tool is that if you close your drawing by connecting the endpoint to the starting point, it will fill the enclosed area in with whatever background color and style you have on except it doesn't do it so well.
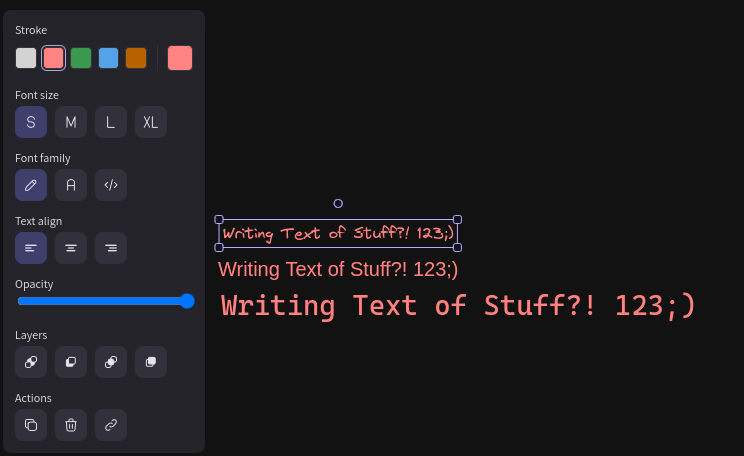
TEXT: The A with a 8 next to it can used to put text down on the screen and on it's left bar you can have 3 new choices for it specially font size, font family, text align. Font size is self explanatory it lets you decide how big it is, font family is the style of the text and text align only effects you when your typing and how it comes out like if it outputs from the left of the bar that you see when your typing or the right.
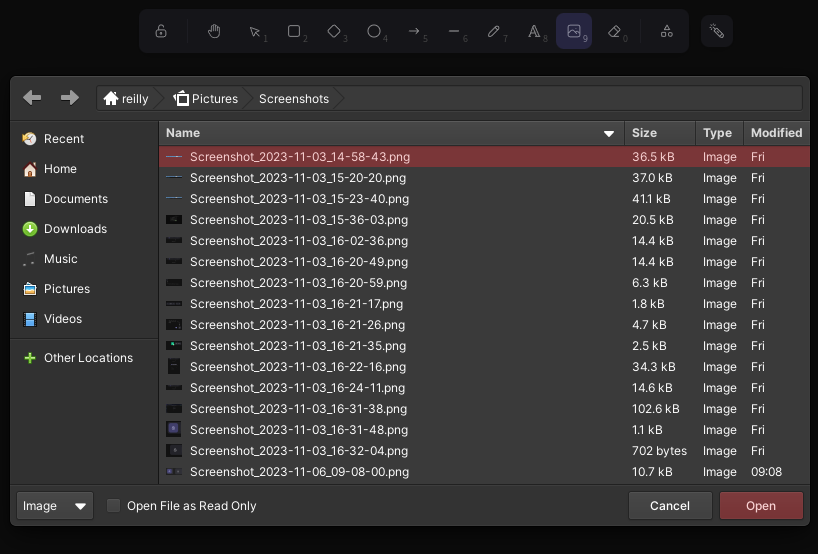
PICTURE: A landscape in square with number 9 next to it can be used to import images from your computer. When you click on it will automatically take you to your pictures but you can still navigate through that folder to whatever you keep your images. When you select the image you want it won't appear on the canvas immediately when you click on the canvas your going to want to HOLD DOWN left click and drag to another corner and you should see the image as you enlarge it and basically make it whatever size you want it.
ERASER: The Eraser with number 0 next to it allows you to erase anything you put on the page. When you hold left click and go over an item it will be grayed out meaning that when you let go it will be deleted and if you didn't mean to go over one specific item you can hold alt while still holding left click and going over the item again and it should no longer be one of the items that gonna be erased and you can tell by if its grayed out or not.
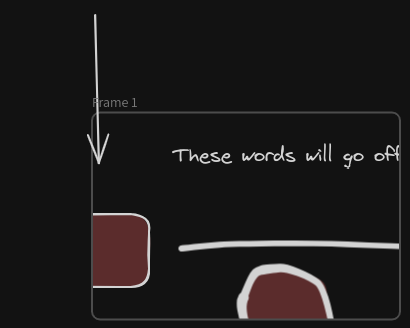
SHAPES: At the end of the bar you will see circle, triangle and square all grouped up together if you press that four options will appear Frame tool, Web Embedded, Laser Pointer, Mermaid to Excalidraw. In frame tool you put down a box that you can write or draw but if start in the that box you can't effect anything on outside of the but if you start from outside the box you can affect everything even the box. To lets say that you typing inside the box and you type long sentence to where it exits the box once your finish the sentence and click of it will delete whatever is not inside the box but if you wanted to put arrow through the box from the outside you could.
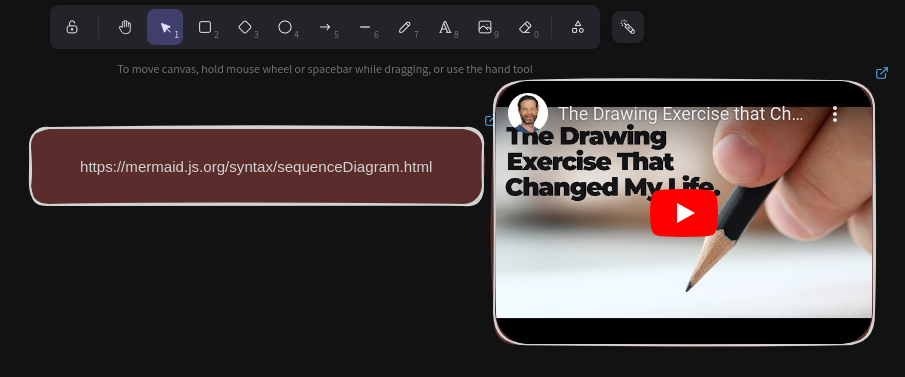
Clicking on Web embedded won't make a anything appear immediately click on canvas after clicking on web embedded and drag you'll make a box that when you click on it a new box will appear above and when you put a link on that box above our box while put it on our box. This will let you put links on canvas that people can click on and go to. Also another feature is that if you put YouTube link in it. It will appear as a video you can watch on canvas.
Laser Pointer option when using it on the canvas will look like your using Pencil but the line will eventually disappear and will leave no marks on canvas when using it. If you want to turn off the laser pointer press k or click on another icon.
Lastly we have Mermaid to Excalidraw that will let you make flowchart and sequence diagram. When you click on it a popup will appear called Mermaid to Excalidraw.
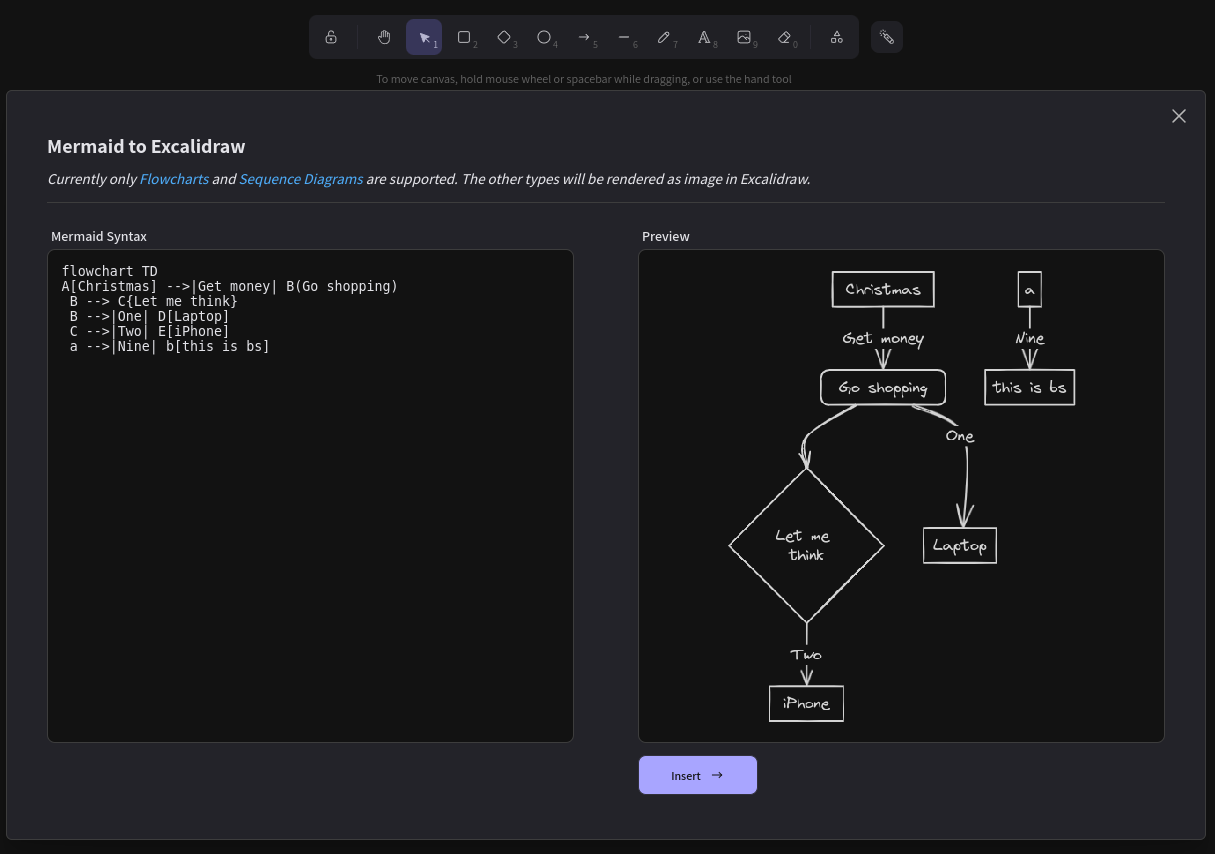
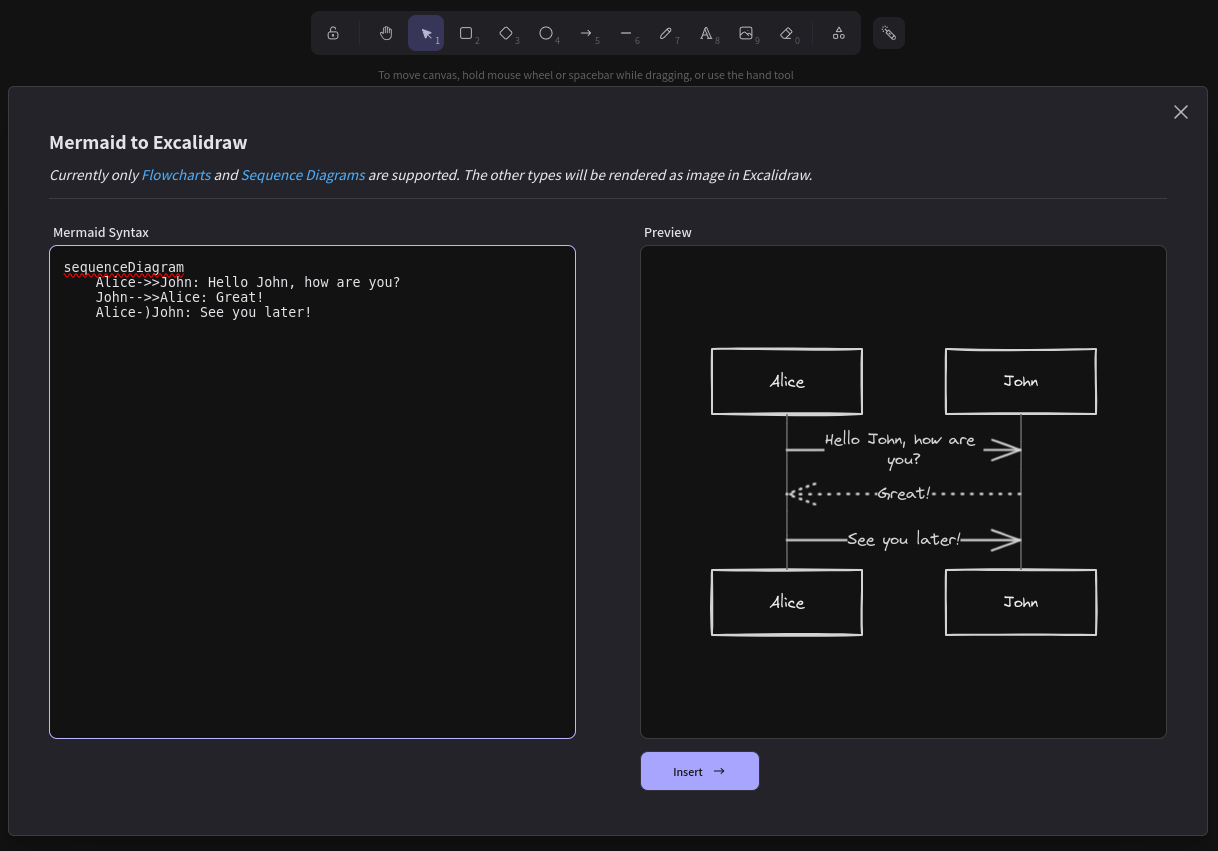
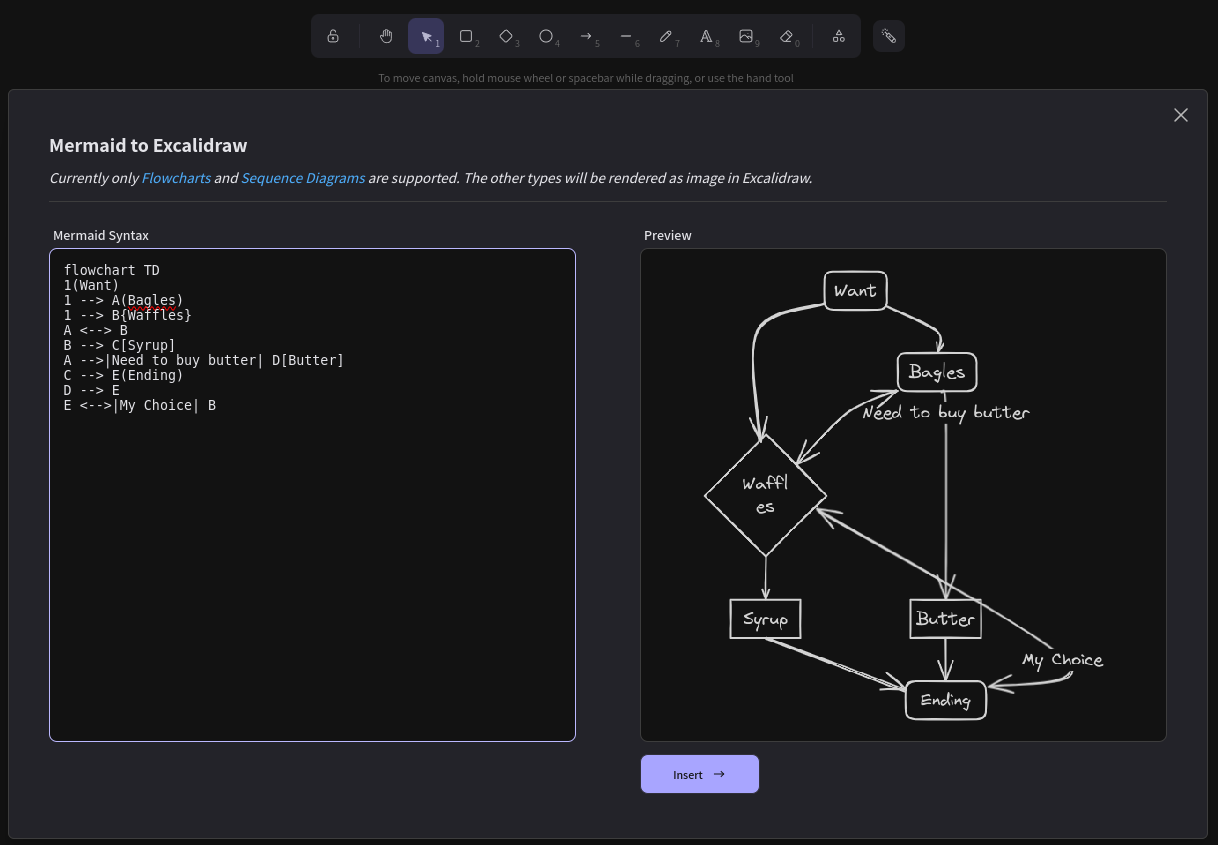
With this you can make your own flowchart or sequence diagrams. If depending oh what you want on the very first bar your wanna type [flowchart TD] or [sequenceDiagram] and exactly the way there type in those brackets even capitalization. First Lets go through on how to use flowchart TD.
FLOWCHART TD: In a flowchart, different symbols are used to represent various elements, and connecting lines indicate the flow of information or actions between these elements. Here's how you can create a flowchart:
-
Circles: Represent an action or decision point. Enclose the action or decision inside parentheses to create a circular border. For example, (Make Breakfast).
-
Squares: Depict processes or steps. Enclose the step inside square brackets to create a square border. For example, [Prepare Ingredients].
-
Diamonds: Indicate decision points or conditional branches. Enclose the condition inside curly braces to create a diamond border. For example, {Hungry?}.
-
Connect Items: Use an arrow symbol (-->), followed by the letter or identifier of the elements, to show the flow of actions. For instance:
- If you have (A) and (B), doing B --> A means that B points to A in the flowchart.
- B --> B makes an item point to itself.
- To have separate items in the same flowchart, just don't connect them with -->.
-
Label Items: You can label items to provide more context. For example, if you have (A) and (B), and you want to indicate that B is coming up with ideas, you can do B -->|Brain| D(Idea Made).
-
Bidirectional Arrows: You can use <--> to show a bidirectional relationship, indicating that two items are connected in both directions.
-
Exclusions: You cannot use <-- in a flowchart, but you can use --> to indicate one-way connections.
When your doing this you also don't need to use letters as representation for whats in brackets you can use numbers like 1 or any word. There just needs to be something to represent whats in bracket.
FLOWCHARTS: A Sequence Diagram is a visual representation of interactions between different participants or objects over time. It is commonly used to depict how messages flow between different elements in a system. Here's how you can create one:
-
Adding Participants:
To start, you can use the
participantkeyword followed by the name of the participant to create a box representing that participant. For instance,participant Davilywould create a box labeled "Davily." -
Sending Messages:
To illustrate the flow of messages between participants, you can use arrows. For example, if you want
Davilyto send a message to Boba, you would writeDavily ->> Boba:followed by the message content, likeHi.This creates an arrow from Davilyto Boba with the message "Hi." -
Changing Participant Names:
If you don't want to type out the full participant name each time, you can use aliases. For example, you can write
participant a as Davilyto refer to Davily as 'a' throughout the diagram. -
Changing Participant Shapes:
You can switch from using
participanttoactorto represent participants as stick figures. -
Different Arrow Types:
You can use various arrow types to represent different message types. For instance:
(->)for a solid line without an arrow.(-->)for a dotted line without an arrow.(->>)for a solid line with an arrowhead.(-->>): for a dotted line with an arrowhead.(-x)for a solid line with a cross at the end.(--x)for a dotted line with a cross at the end.(-->)for a dotted line with an open arrow at the end (asynchronous).
-
Activating/Deactivating Participants:
To highlight a specific participant's activity within the diagram, you can use
activateto create a gray bar anddeactivateto remove it. This helps focus on the interactions of a particular participant during a certain period. -
Adding Notes:
You can add notes to the diagram to provide additional information or comments. To add a note, use the
Note overorNote left offollowed by the participant's name and the content of the note. For example, to add a note to Davily's message, you can writeNote over Davily: she said hey. -
Positioning Notes Between Participants:
If you want to place a note between two specific participants, you can use
Note overorNote left offollowed by both participants' names, separated by a comma. For instance,Note over Davily, Boba: whatever you want to saywould place a note between Davily and Boba.