Configuring eM Client
Prerequisite: You'll first need to download eM Client from the internet and set up your account, refer to the article in Mail Clients for help setting up your account before continuing this article.
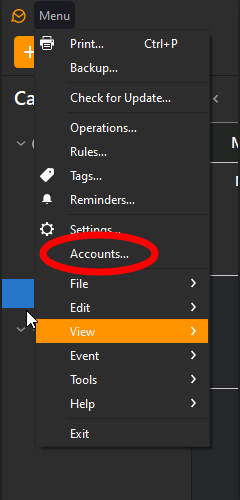
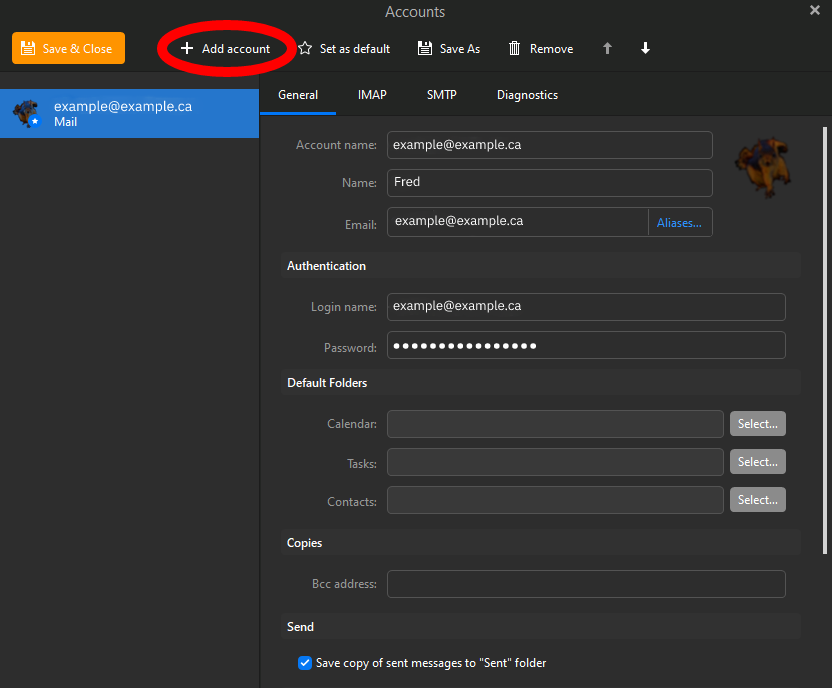
Step 2:
Once you click on Accounts, a new tab will open. Next, navigate to the + Add account menu.
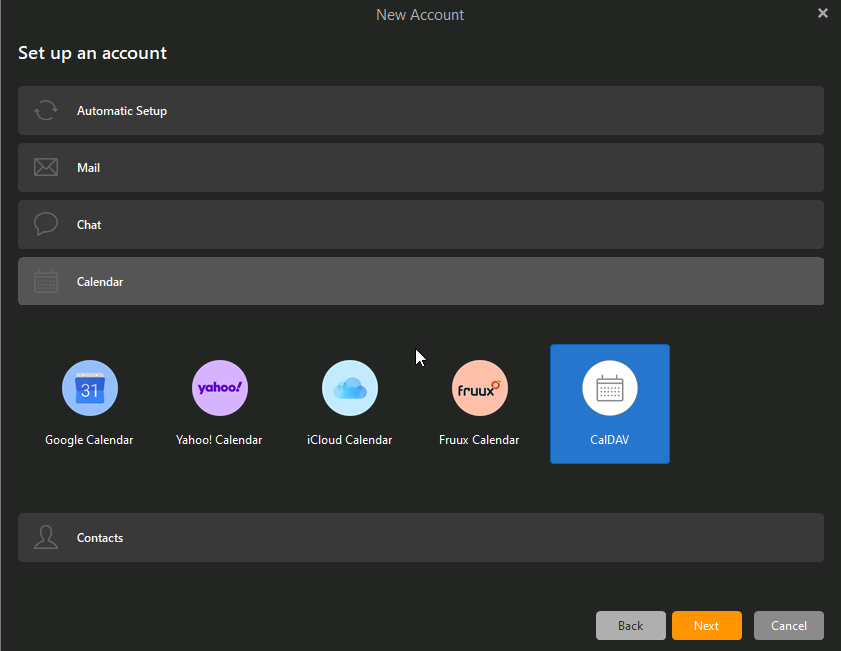
Step 3:
A new tab will open, next navigate to the Calendar bar. You'll see multiple calendar option to select. Select the CalDAV Option and hit next.
Step 4:
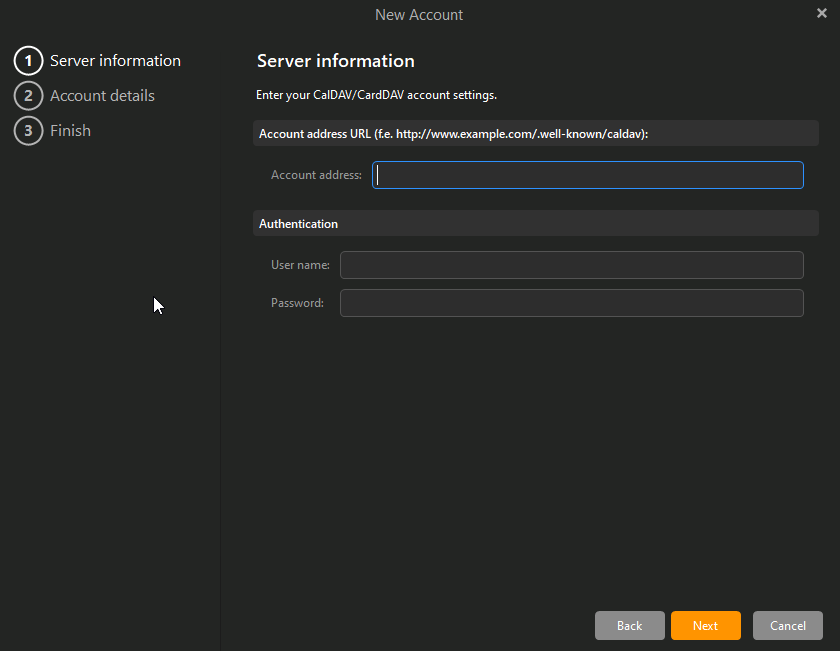
Next, you'll be asked to provide the CalDAV address, as well as User Authentication. Paste the CalDAV Address in the Account address bar, and use your Nextcloud email in the Authentication section.
Step 5:
Next, it'll ask for an account name, just use the one it autofills, it should be your Nextcloud email, then hit next.

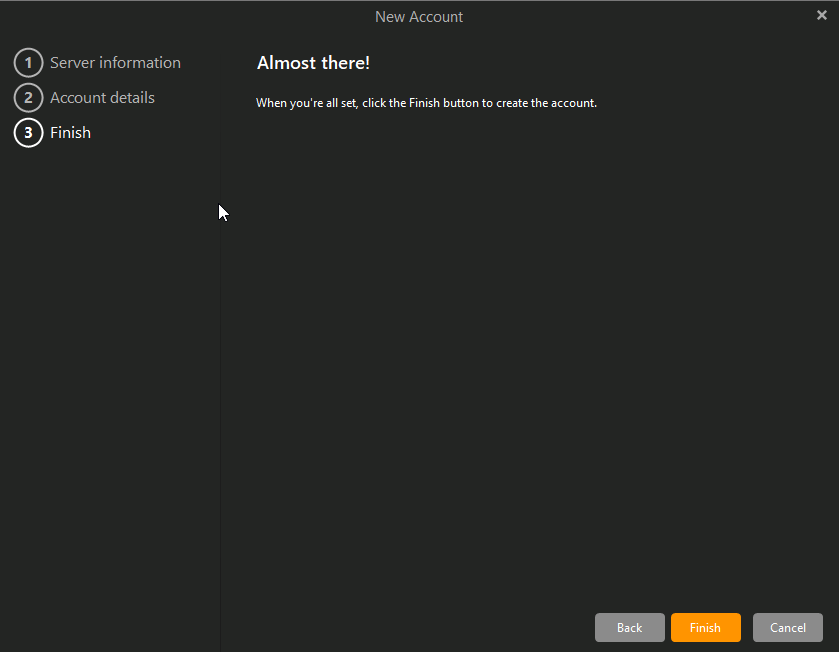
Step 6:
Next, hit finish. It'll take a few minutes to sync up, but after a few seconds, Congratulations, you are now synced with Nextcloud Calendar in eM Client!